[7.4] Google Camera Settings
Good day to all. If you have opened this article, it means that you are interested in setting up the Google Camera modification correctly.
This article is copyrighted. Any copying of it without specifying the source and author will be a violation of their rights.
Let’s not wait too long, let’s start.
PLEASE READ ALL THE INFORMATION PROVIDED, SO THAT IT IS NOT THAT ALMOST AT THE END OF THE ARTICLE DESCRIBES YOUR PROBLEM, AND YOU SCROLLED THROUGH IT, LOL.
Preface.
For correct and smooth operation of Google Camera, we recommend installing a custom clean Android firmware. The author of the article, the tester and administrator-themihaels and the author of the modification-tigr, after a long use of the MIUI shell ( you may have another one), recommend using custom firmware. The shell may have brakes, friezes, and overhangs. The administration of the tigr mod is not responsible for poor optimization of MIUI developers.
For normal operation of the camera, we recommend the LEVEL_3 level of the Camera2API drivers in the Camera 2API Probe application.

You can download the drivers online, and install them via tvrp. If your camera does not work, please make logs and send them with the essence of the problem in Telegram (link at the end of the article).
The author of the article recommends the Havoc, Pixel Experience, and StagOS customizations.
In order to avoid inconsistencies in settings, bugs, refocus, etc. before you install GCam and after CLEAN the CACHE of the APPLICATION.
Settings-Apps-Camera-Clear data ( Storage-Clear storage). Restart the device.
=== 1. Camera version ===
You can download the latest version on the mod channel. (The text is clickable).
= = = 2. General setting ===
Purely my subjective recommendation, each setting has a description, you can customize it for yourself.
You can also disable Google Lens Hints, customize Gestures, and enable Grid, sound, and geotagging in GCAM.
A lot of fixes, new AWB, fixes, optimizations, and innovations were added, including the well-known libpatcher, which will be discussed below. And now.. Let’s set up our camera correctly.
Each function has a description. After the first turn on and familiarization with the settings, turn on and off what you need and do not need.
Go to SETTINGS-STANDARD SETTINGS.
Enable the following settings:
• Dirty lens-notifies you that you need to wipe the lens if it is dirty.
• Grid-set which one is more convenient for you to use, I put 3x3. The grid is needed for a more convenient horizontal orientation.
• Gestures — here you can configure actions with buttons and double tap on the screen.
Go to the main page.
Turn on:
• HDR+ control-activates the HDR+ control (exit settings-camera-the HDR + icon will appear on top-advanced HDR+)
• Shooting tips — tips that will pop up in certain scenes (for example, when taking a selfie, the camera will tell you a better angle)
Save selfies in their original form-photos will not be mirrored.
Depth of field in the social network.networks, RAW control, Instant HDR+, Shutter speed Slider in the Viewfinder Buttons, Geotags, camera Sounds, and so on — all this has a description under each setting, you can choose these settings yourself if you want.
You can also configure the display of frequently changed settings in the settings menu, change the opening of the default mode, the camera theme, as well as the maximum possible zoom.
Google Photos
If you have a Google Camera, then take care of installing Google Photos.
Google Photos allows you to sync photos and videos to the cloud, send files to the trash that can be restored for up to two months(then they will be deleted themselves), and make collages of your photos directly in the gallery.
Only through the enabled function And Google Photos itself, you can view all the panoramas you made(photosphere (photo in 360), horizontal panorama, fisheye, etc.), the movement function also works only through Google photos.
- Google Photos also lets you work with photo details, focus, and blur when taking photos in Portrait or Blur mode.
Cropping, filters of course are, however, it is worth noting that there are no brushes, frames, stickers and other pribludy for” make-up “ photos.
Separately, I note that in this application, you can stabilize the video directly through the settings, if necessary.

Shooting in RAW
Shooting in RAW format (the RAW + JPEG mode Control Function) allows you to achieve a photo with maximum details, lights, shadows, and gamma for subsequent processing. The photo as it is, without software processing. Useful for anyone who processes photos in Lightroom and Photoshop.
In the camera itself, in the viewfinder, at the top of the panel, you will see a choice of shooting: just JPEG or RAW+JPEG. In the second case, in addition to simple HDR in JPEG, another photo will be saved in. dng format — RAW.
Location of RAW files on the device:
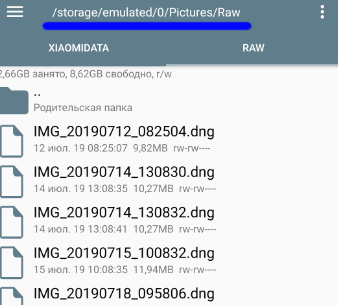
Остальное всё на ваше предпочтение.
=== 3. Auto White Balance and Library ===
Auto White Balance-averaging functionality in color neutrality. No blue, yellow, or other color distortion. Configurable in the color Settings.

- Library-a binary file that sets the color gamut, detail, and noise reduction settings.
The author uses a personal contrasting and more “voluminous” Fresco library.
The recommended AWB option is Auto(the system will select the recommended parameter itself).
=== 4. HDR + Settings ===
Recommended setting:
• JPEG quality — Set to 100%. If you are not interested in a large file size and + — acceptable image, then put 97%, but you will lose a little bit details.
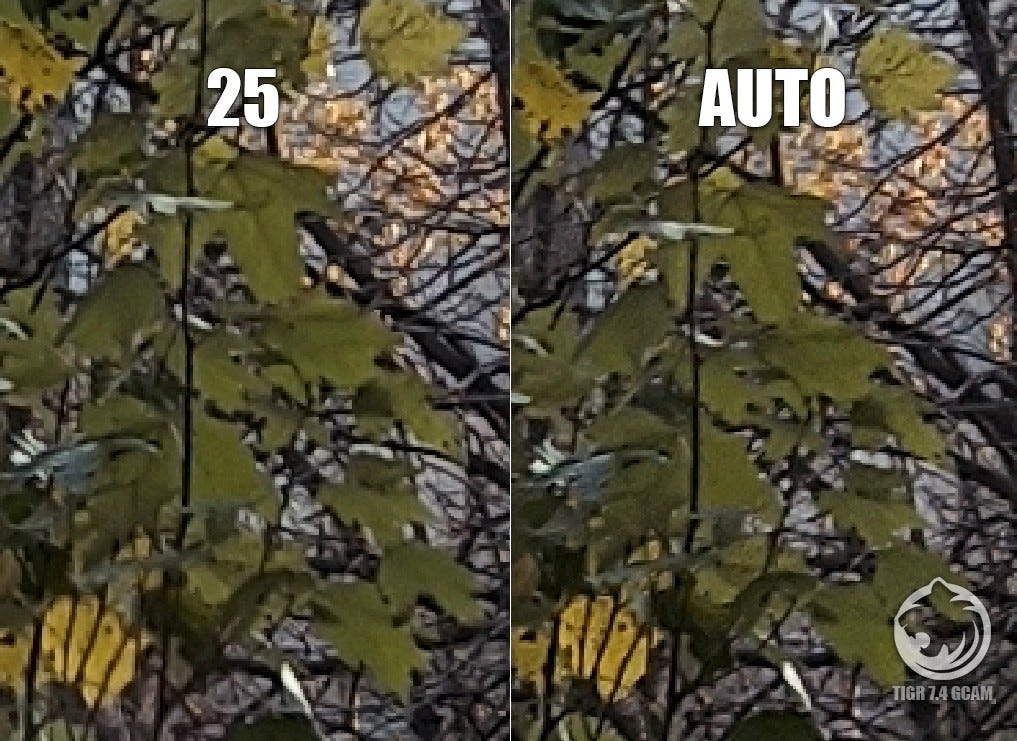
• HDR+ quality-set the value to 15.
Below is an example of comparing two photos — 25 frames and automatic selection of frames by the camera. In the second case, you may get the impression that it is more detailed, but this opinion is erroneous, because the second photo contains noise, which creates the effect of detail. It is better to add grain or sharpen by hand than to clean up the noise without losing the details.
- Auto-exposure correction: only for advanced HDR+. Switches the camera to shutter priority mode (Tv or S on DSLRs). What shutter speed you set — the camera will shoot on this one, and ISO will select it automatically. Works only in low light conditions: if there is a lot of light, the camera will automatically reduce the shutter speed, because otherwise the output will be a pure white frame.
- Exposure is roughly the amount of light that a frame receives. With the correct exposure, the frame is illuminated evenly, there are no gaps in the shadows, or over-illuminated light areas. The amount of light per frame depends on three things: aperture, light sensitivity (ISO), and shutter speed. We recommend setting the value to -0.2. Dark areas and shadows contain more information about the photo and more dynamic range. It is always easier to lighten a photo than to remove overexposure. Now any service and social network has an exposure correction parameter, if you don’t have one, for example, in the gallery.
Configurable in the color Settings.
Visually:

- Photosensitivity: most often they write “ISO”, although this is just the name of the system used to measure the sensitivity of film cameras. The higher the ISO, the brighter the frame will be with the same amount of incoming light, but also the more noise will be on the frame, which must be smoothed out by noise reduction. ISO 100 is de facto taken as the starting point-that is, images with ISO 100 will have a minimum amount of noise, while at ISO 200 the signal amplifier from the matrix works twice as strong, at ISO 400 — twice as strong, and so on (for Samsung and Apple, ISO 50 is taken as the starting point, and somewhere ISO 25 is also found — a purely marketing move).
You can adjust the ISO using the slider on the viewfinder, which is enabled in the settings in the viewfinder buttons. - Shutter speed: Measured in fractions of a second or seconds — this is how long the camera sensor will take the image. The lower the shutter speed, the less light will fall on the camera, and Vice versa. A short reminder from math: the shutter speed of 1/100 sec is less than 1/50 sec. If the shutter speed is halved, then the ISO must be raised twice to get a frame of the same brightness, and Vice versa.
You can adjust the shutter speed using the slider on the viewfinder, which is enabled in the settings in the viewfinder buttons. - Saturation — the corresponding parameter that will appear in light and dark areas. In other words, if the photo comes out dark, you should pay attention to increasing the exposure or increasing the saturation parameter in dark areas.
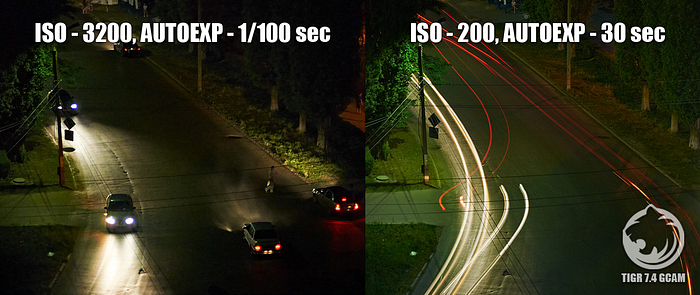
What should I do with all this? Let’s look at an example: if a bright good frame is obtained for 1/20 seconds and ISO 1600, then you can use auto-exposure correction:
1. Put the camera on a tripod and set it for 1 second, then the automation will reduce the ISO to 100 (minimum) and you will get a frame devoid of any noise, clear and clear, as in the daytime.
2. Do you shoot with your hands? Set 1/10 sec, then the automatic will reduce the ISO to 800 and the frame will be much less noisy. And if your hands don’t shake, try 1/5 sec or even 1/3 sec — the ISO will decrease even more, and the frame will turn out even better (but do a few takes, a 1/3 sec fall from the hands is already very likely).
3. You shoot a dog or cat that is not in place. Set 1/100 sec, the ISO will grow to 4000, but the frame will be clear, the dog will not turn into a blur. For people in group photos, I recommend 1/20 seconds, for close-UPS-1/33 seconds.
4. you are shooting an evening fountain — set the shutter speed of 1/3 sec and lean on something, the movement of water is beautiful and effectively “smeared”. And if you set the shutter speed to 1/100, you will see individual drops.
Thus, auto-exposure correction is one of the main tools of a mobile photographer.
Visually:
If you still don’t understand how these two parameters work, then take pictures in AUTO mode.
• The P3 Display function (DCI-P3) allows the camera to cover more color spectra, however, this function does not work on state employees, only on flagships. On state employees, the algorithm will work out, only there will be color distortion.
As practice shows, sRGB and P3 almost do not differ by eye, so the loss is insignificant.
Phones newer than the Redmi/Note 9 series (and including them) and newer have temporary problems with stabilization and retouching!
=== 5. Astrophotography ===
New Google Camera version 7! Now the camera automatically detects the amount of light in the frame and combines night photography and star photography. Here you can configure how bright the frame will be (exposure) and how many seconds the astrophotography will be processed( each has its own parameter, for example, RN4X — 1 second, RN7–15 seconds, RN8 and further-30 seconds or more. It all depends on the internal libraries from the manufacturer and the camera matrix).

=== 6. Video ===
There is nothing special to say, everyone will choose the quality for themselves. I can only note that it is best to set an automatic bitrate to avoid running out of space. If you have a lot of internal memory, then put 70 MB/s.
Recommendation: Shoot 4K video, because 4K captures more information and details, and when compressed to 720p or 1080p, the quality will be even better. If you don’t have a lot of space on your phone, it’s better to shoot in 1080p 30 FPS with a bitrate of 30–40 MB/s.
We recommend installing the USGP Magisk module to disguise your phone as a Google Pixel. This way you will have an infinite storage in Google Photo, where you can upload your photos and videos. If we consider the option without root, I can recommend a cloud service dublox.com with free 1 TB of space in the cloud, where you can upload photos and videos in addition to other files. (Not advertising (!)).
The only thing I can note is that when video stabilization is Enabled, 30 FPS will work as it should, and 60 FPS will probably zoom wildly. Therefore, to avoid these “zooms” — turn off the camera.
• Audio zoom-the volume in the video will increase along with the camera zoom.
• Optical stabilization (OIS) — on a device with an optical stabilizer will work, otherwise — no, even friezes are possible.
Efficient compression algorithm-saves space without loss of quality.
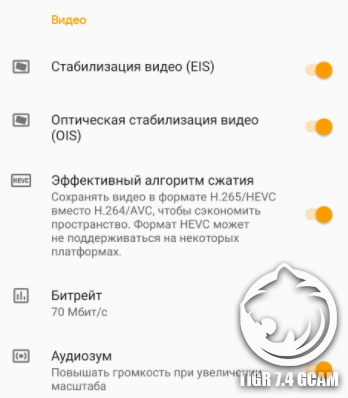
So it turns out that if you need stabilization, turn it on, although I don’t know why, because 60 FPS is more pleasant to the eye, and you can stabilize the video in Google Photo, but 4K captures more information in the video, when compressed in FullHD, the quality is better, but 4K also weighs more, see for yourself.
= = = Camera Modules ===
For smartphones where there is more than 1 camera on the back of the device, you can configure the so-called multi-module (AUX) in the corresponding item camera Modules.
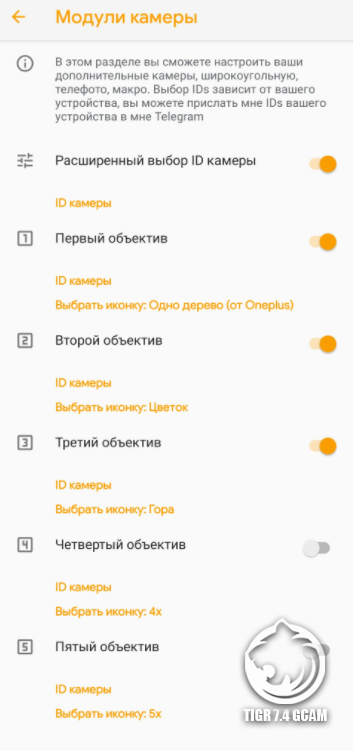
Here you can configure the camera ID and the module icon.
Common array of cameras:
0-main.
1-front.
2 — module of depth.
3-wide-angle.
4-macro.
Alternative array of cameras (as on RN8):
0 — main.
1-front.
21-depth sensor.
22-wide-angle.
61-macro.
=== Libpatcher ===
Functionality that allows you to work with sharpness and noise reduction directly from the camera.
Recommended preset unique for all modules:
- Sharpness: 1.375–1.5
- Brightness noise reduction: 1.0
- Color noise reduction: 1.0
- Saturation: 1.0
- ISO (ISO limiter): 4000
- Photo processing: on
- Temporary noise reduction: 2048
- Depth of field: 2.0
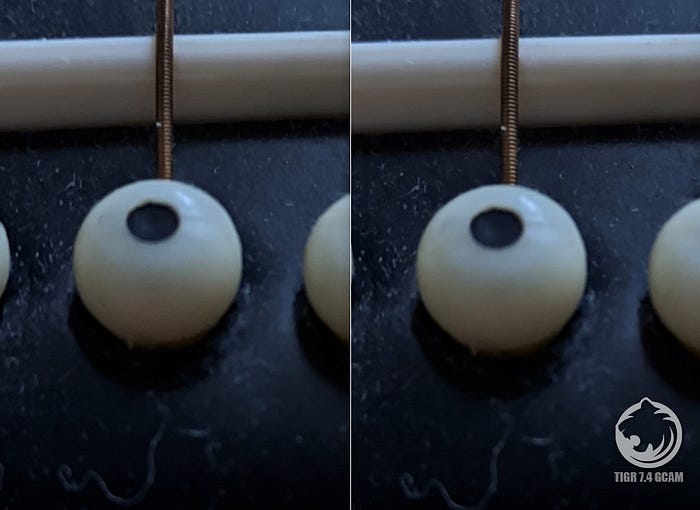
This whole thing is Called “configuring the library”. So you can compare how the frame looks in comparison with the stock values (all 1.0) and with the changed parameters.
=== Playground ===
Playground is a new mode in GCam that allows you to add AR stickers to the frame. Make your photos and videos live with Playmoji, characters that react to you and each other. Add stickers that will enliven the world around you, or funny inscriptions that emphasize what is happening.
Turn a Playground into a pokemon battle arena, or an Imperial fortress. This app will help you Express yourself and bring your story to life in a photo.
Playground requires the latest version of ARCore.
To install, see this: https://www.celsoazevedo.com/files/android/google-camera/ar/
You can learn more about the installation on the 4pda — *click* website (the text is clickable and you need to be an authorized 4pda user to download content).
Retreat
Personally, I used MIUI, a Redmi Note 9 ProEU 6/64 device. Tested different Google Camera mods, some versions of frizili at certain points. Most likely, not optimized system does not allow the camera to work normally. With an unlocked bootloader and TWRP for my version (look for information on the site 4pda for your device), put a clean Android (crDroid, Pixel Experience, HavocOS, LineageOS, StagOS, etc.)) and all the friezes are gone. Drops are made well, shooting at 60 fps without problems. The functionality of movement, focus tracking, etc. works without problems.
The author does not agitate to switch from your shell, most likely, so, note (I myself sit on StagOS and advise everyone).
______________________________
I hope that this guide helped You:)
All the settings that I did not mention were considered insignificant for their mention.
If you have any questions, I will be happy to answer them.
The author of the GCAM by tigr mod is @tigr.
Author of the article, tester, and also say thank you — @themihaels
Channel with the latest camera updates — *click me*
Our Global chat in Telegram — *click me*